Connect a Shopify shop
For Invdash to read and update your Shopify shop, you create a small private app in Shopify. The app is only Shopify's way of giving Invdash a key with the right permissions: you write no code and publish nothing.
It takes about five minutes, and you do it once per shop.
What you need
- To be an owner or admin in Invdash.
- To be the shop's owner in Shopify, or to have the right to develop apps in the shop.
- The shop's address, for example
your-shop.myshopify.com. You find it under Settings › Domains in Shopify.
Create the app in Shopify
The pictures show Shopify in Swedish; the pages are the same in English.
-
In your shop's Shopify admin, open Settings › Apps and click Develop apps, then Build apps in Dev Dashboard.

-
Click Create app, choose to create it manually (Start from Dev Dashboard), and name it
Invdash.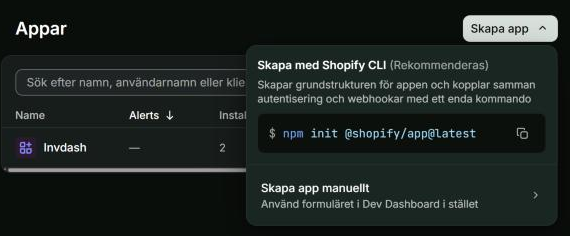
-
Open Versions and create a version. Paste the access scopes below into Scopes, leave the rest as it is, and click Release.
read_products,write_products,read_inventory,write_inventory,read_locations,read_orders,write_orders,write_order_edits,write_shipping,read_customers,read_merchant_managed_fulfillment_orders,write_merchant_managed_fulfillment_orders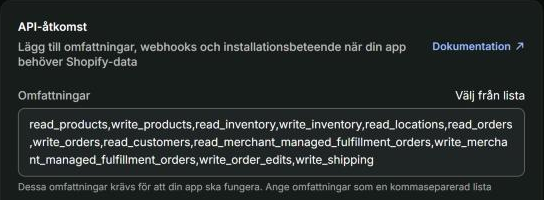
-
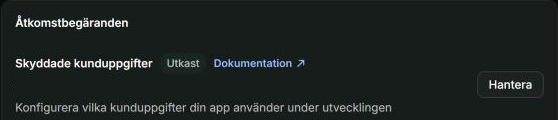
Open the app's Settings and scroll to Access requests. Click Manage beside Protected customer data, tick protected customer data with name, address, phone and e-mail, and save. Without this step Invdash can't read your customers.
-
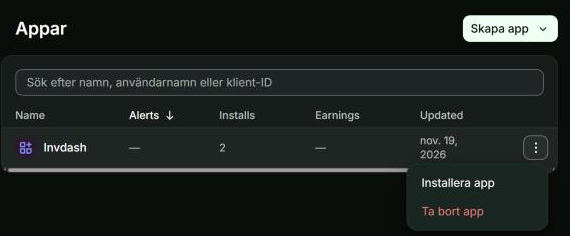
Go back to Apps, open the three-dot menu on the Invdash row and click Install app. Choose your shop and click Install.
-
Open the app's Settings again. Under Credentials are the Client ID and the Client secret: you need both in the next part.
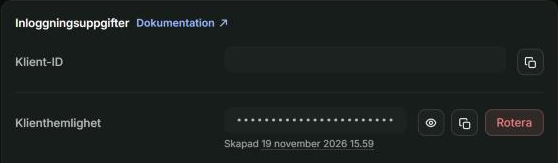
The client secret gives access to your shop. Paste it only into Invdash, and never send it by e-mail or chat.
Connect the shop in Invdash
- In Invdash, open Settings › Integration › Stores and click Add store.
- Choose Shopify under Shop platform.
- Enter the Shop address, the Client ID and the Client secret. If you leave Name (optional) empty, the store gets the name the shop has in Shopify.
- Click Create store.
- If the shop has several locations, the form asks you to choose one under Location. Choose it and click Create store again. Invdash keeps one stock number per product, and reads and sets the stock at the location you choose.
Invdash checks the connection before the store is saved. After that, products, orders and customers are read in, and Shopify sends changes to Invdash by itself.
If something doesn't work
- Shopify didn't accept the client ID and secret. Copy both again from the app's Settings in the Dev Dashboard. Check that no spaces came along.
- The app isn't allowed everything Invdash needs. Invdash names the scopes that are missing. Add them in a new version of the app, click Release and approve the update on the shop.
- The app can't act on this shop. Install the app on the shop (step 5 under Create the app in Shopify), and check that the app and the shop belong to the same Shopify organization.
- Customers aren't read in. Go through step 4 under Create the app in Shopify, about protected customer data.
When Invdash needs more permissions
When Invdash gets new features, the app may need another access scope. You then add it in a new version of the app and approve the update on the shop. Test connection on the store's row says which scopes are missing.